 |
| The kids' bathroom make-over! |
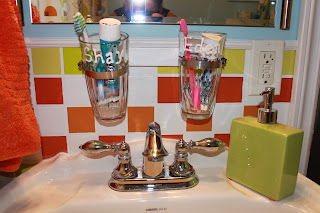
There really wasn't anything wrong with the kids' bathroom upstairs, except that they would not use it after we remodelled the main bathroom!! It was driving me crazy, so I took my daughter shopping to pick out decor that was more kid friendly. I did not want to sink much money into this, so it was to be done on a limited budget. The tiles had to stay, but were a neutral beige kind of a colour that we were able to work with. We started by picking out a new shower curtain and then built the palette from there. I am quite pleased with the results and the best part is, the kids use it!!
Okay, I forgot to take BEFORE pictures, but in all honesty it didn't look much better than this. There was a vent/fan in the middle of the wall, a towel bar below and a plain white waffle type fabric shower curtain. The bathroom is very small and the vanity that was in there was poorly installed, so water ran down behind it and b/w the tub and sink all the time. It was pretty yucky!!
BEFORE:
The bathroom was dark and certainly not very fun!
AFTER:
It truly is quite amazing to see what a coat of paint and little creativity can do!! My daughter picked out this colourful curtain (that I loved as well) and this became the inspiration for the room. My husband installed a pedestal sink which worked much better in the space. The vent/fan is still there, but doesn't seem so bad against the blue walls. I had the shelf above the toilet in the basement, so just had to give it some fresh paint. I bought a cheap canvas at Jysk and made a simple piece of art for the room.


